Matlab Plotting
Contents
X-Y Line Plots
Perhaps the most common plots we create as engineers are x-y line plots that show the functional dependence of one variable (y) on another (x). In MATLAB, an x-y plot is very simple to make. For example, if we want to plot  on the interval (-π,π) we can do this simply as
   x = linspace(-pi,pi);  % create the x vector
   plot(x,cos(x));        % plot cos(x) versus x.
Basics
The basic syntax for plotting a function is the following
   plot( x, y );       % simplest way to plot a single function
   plot( x, y, 'abc'); % controls the line style
Here a represents the color to use when plotting this function, b represents the type of symbol to use (dots, squares, etc), and c represents the style of the line to use (solid, dashed, etc). The following three tables describe what to insert for a, b and c to control plot styles.
| Symbol | b | g | r | c | m | y | k | w | |
|---|---|---|---|---|---|---|---|---|---|
| Color | Blue | Green | Red | Cyan | Magenta | Yellow | Black | white | Default color |
| Symbol | . | o | x | + | * | s | d | ^ | v | < | > | p | h | |
|---|---|---|---|---|---|---|---|---|---|---|---|---|---|---|
| Description | Point | Circle | x | plus | star | Square | Diamond | Triangle (up) | Triangle (down) | Triangle (left) | Triangle (right) | Pentagon | Hexagon | No Symbol |
| Symbol | - | : | .- | -- | |
|---|---|---|---|---|---|
| Description | Solid | Dotted | Dot-Dash | Dashed | No line |
The following are some examples of creating plots
   x = linspace(-pi,pi);    % create 100 points between -pi and pi
   y = sin(x) .* cos(x);    % evaluate a function at each point
   plot(x,y,'rs:');         % plot a red dotted line with squares
   figure; plot(x,y,'g--'); % plot a green dashed line
   figure; plot(x,y,'ko');  % plot black circles (no line)
Note that the figure command creates a new plotting window. If you leave it out, the next plot will be overwritten.
Title and Axis Labels
Any time you create a plot, you must also label it! Axis labels (with units where appropriate) are critical. To create a title and label axes a plot in MATLAB, we use the following:
  xlabel('label text');
  ylabel('label text');
  title('title text');
| Text | Symbol | Text | Symbol | Text | Symbol | Text | Symbol | |||
|---|---|---|---|---|---|---|---|---|---|---|
| \Lambda | Λ | \alpha | α | \kappa | κ | \sigma | σ | |||
| \Xi | Ξ | \beta | β | \lambda | λ | \tau | τ | |||
| \Pi | Π | \gamma | γ | \mu | μ | \chi | χ | |||
| \Sigma | Σ | \delta | δ | \nu | ν | \psi | ψ | |||
| \Theta | Θ | \epsilon | ε | \xi | ξ | \omega | ω | |||
| \Psi | Ψ | \eta | η | \pi | π | \gamma | γ | |||
| \Omega | Ω | \theta | θ | \rho | ρ | \phi | φ |
Example:
   x=linspace(-pi,pi);   % create a row vector of 100 points on the interval [-pi,pi]
   plot(x,cos(x),'r--'); % plot with a red dashed line
   xlabel('\theta');
   ylabel('cos(\theta)');
   title('A plot of the function cos(\theta) as a function of \theta');
Multiple Lines on a Graph
We often want to place multiple lines on a single plot. For example, if we want to plot the functions
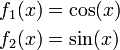
on the interval (-π,π) we could do the following
   x = linspace(-pi,pi);
   f1 = cos(x);
   f2 = sin(x);
   plot(x,f1, x,f2);
Here MATLAB automatically selects the colors for the lines. If we want more control over line styles, we can specify them ourselves:
plot(x,f1,'k-', x, f2, 'r:');
The hold on command
   x = linspace(-pi,pi);
   f1 = cos(x);
   f2 = sin(x);
   plot(x,f1,'k-');
   hold on;
   plot(x,f2,'r:');
   hold off;
Adding a Legend
When we have multiple lines on a single plot, we should add a legend to describe each line. The legend command can be used for this purpose. Its syntax is
legend('entry 1', 'entry2', ... 'entry n');
Continuing with our previous example, we would have something like
| MATLAB Source | Resulting Plot |
|---|---|
% Manually control the line styles.
x = linspace(-pi,pi);
f1 = cos(x);
f2 = sin(x);
plot(x,f1,'g-', x, f2, 'r--');
xlabel('x'); ylabel('f(x)');
legend('cos(x)','sin(x)');
|
 |
% Use MATLAB's default line styles.
x = linspace(-pi,pi);
f1 = cos(x);
f2 = sin(x);
plot(x,f1, x,f2);
xlabel('x'); ylabel('f(x)');
legend('cos(x)','sin(x)');
|
 |
Log-Scale Plots
Plotting things on a log-scale is useful sometimes, particularly when data spans a wide range of values from very small to very large. There are three Matlab commands that can be used to create log-scale plots:
semilogx(x,y,'abc')
- Creates a plot that is log-scale in x and linear in y. The 'abc' controls line formatting.
semilogy(x,y,'abc')
- Creates a plot that is linear in x and log-scale in y.
loglog(x,y,'abc')
- Creates a plot that is log-scale in both x and y.
Example
There is a popular saying that a piece of paper cannot be folded more than seven times [1][2]. Each time you fold a piece of paper in half, the number of sheets doubles. We can express this mathematically as  , where
  is the number of sheets and
  is the number of times we have folded the paper.
The thickness of the folded paper can be expressed as

where  is the thickness of a single sheet of paper. While paper comes in many thicknesses (see, [3]), let's assume that a typical piece of paper is 0.004 inches (0.1 mm) thick.
Let's plot W as a function of the number of folds, . The figures below show the results plotted on a linear scale (left) and semilog scale (right)
| linear scale on x and y (used Matlab's plot command) | Linear scale on x, Log scale on y (used Matlab's semilogy plotting command) |
|---|---|

|

|
The matlab file to generate these plots can be found here.
Note that after 20 folds, the thickness is 5243 inches (437 feet). After 30 folds, the thickness is 84.7 miles!
Subplots
Sometimes we want to place several plots in a single figure (plotting window). This is done by using the subplot command. The subplot command has the following syntax:
subplot( nrows, ncolumns, position );
This tells Matlab to create a figure with nrows rows and ncolumns columns, and to place the next plot in the position place in the subfigure. The position argument counts along rows. The following example illustrates usage of subplots.
| Matlab Code | Resulting Figure |
|---|---|
clear; clc; close all;

x = linspace(0,2*pi);
subplot(3,2,1);
plot(x,sin(x)); title('sin(x)');

subplot(3,2,2);
plot(x,tan(x)); title('tan(x)');
axis([0,2*pi,-5,5]);
grid on;

subplot(3,2,3);
plot(x,sin(x).*cos(x)); title('sin(x)*cos(x)');

subplot(3,2,4);
y = linspace(0,2*pi);
z = sin(x')*sin(y);  % this is a matrix.
surf(x,y,z); title('sin(x)*sin(y)');
xlabel('x'); ylabel('y'), zlabel('z');
shading interp;
view([-2,-4,3]);
axis tight;

subplot(3,2,5);
plot(x,x.^2); title('y=x^2');
grid on;

subplot(3,2,6);
x = linspace(-1,1);
plot(x,x,'r-',x,x.^2,'b-',x,x.^3,'g--');
legend('y=x','y=x^2','y=x^3','Location','SouthEast');
grid on;
|

|
Fine-Tuning
- Adding a grid. To add a grid to a plot, use the following matlab commands
grid on Turns the grid on grid off Turns the grid off grid toggles the grid on/off
- Changing axis ranges. To change the scale on the axes, use the axis command:
axis( [xlo,xhi,ylo,yhi] );
- Here you provide a vector specifying the limits for each coordinate axis.
- Advanced formatting & exporting plots in Matlab - a collection of notes by Mike Hansen.
Contour & Surface Plots
|
Histograms & Bar Graphs
|
Pie Charts
|